Printing to an RMU printer from your own computer has never been easier. For our macOS users, we have an RMU WiFi Print app that allows you to choose the printers that you want to install and managed previously installed printers.
RMU WiFi Print for Mac requires macOS 10.14.x Mojave or higher.
Before installing any printers with RMU WiFi Print for Mac, RMU IT recommends removing any existing RMU printers installed with previous versions of the application.
- Open System Preferences located in /Applications
- Select Print and Fax (or Print and Scan, depending on your OS version)
- Select any previously installed RMU printers and click the (-) button to remove them
On This Page
Installation and Usage
Printing to a Printer
Automatic Updates
Manually Checking for Updates
Updating when there is an update available
macOS Mojave (10.14.x) / Catalina (10.15.x) / Big Sur (11.x) / Monterey (12.x)
Download the installation package for the printer(s) you would like to install.
Academic Print Server - PS01
- Hale Center
- Hale Cafe - Xerox AltaLink B8045
- John Jay Center
- JOHLF - HP LaserJet P3015
- JOH117 - HP LaserJet P4015
- JOH233 - HP LaserJet P3015
- Library
- MoonLibrary - Xerox AltaLink B8055
- MoonLibraryBW / MoonLibraryClr - Xerox AltaLink C8045
- Patrick Henry Center
- PAT102 - Xerox AltaLink B8045
- PAT308 / PAT308Clr - Xerox VersaLink C7020
- School of Business
- SBUS118 - HP LaserJet P3015
- SBUS210 - HP LaserJet P3015
- SBUSRise - Xerox AltaLink B8045
- Wheatley Center
- SCIS119 - Xerox Phaser 5550DN
- SCIS120 - Xerox Phaser 5550DN
- SCISLounge - Xerox AltaLink B8045
- Scaife Hall
- ScaifeHallClassrooms - Xerox AltaLink B8045
- Yorktown Hall
- Yorktown / YorktownClr - Xerox VersaLink C7030
Administrative Print Server - PS02
- Center for Veterans and Military Families (Jefferson Center)
- VetsCenter - Xerox VersaLink B405DN
- Scaife Hall
- SNHS2 - HP LaserJet 400 Color M451dn
- SNHSClr2 - HP LaserJet 400 Color M451dn
- Wheatley Center
- SCISDean2 - HP Color LaserJet CP4025
SCISDeanClr2 - HP Color LaserJet CP4025
- SCISDean2 - HP Color LaserJet CP4025
**Use JAMF Self Service for RMU provided Macs
To print wirelessly from a Mac, follow these instructions:
- Download the latest version.
- Double click on the zip file to extract the application.
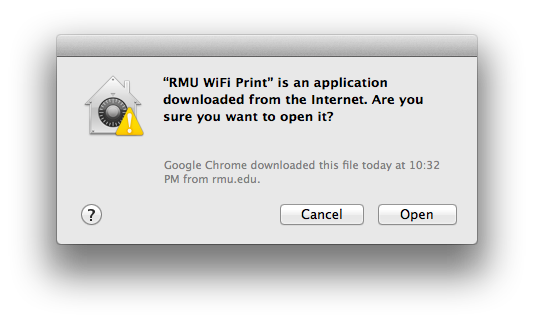
- Double click on the RMU WiFi Print application.
- On first launch, you will see a security warning similar to the one shown below. Click Open.
- On the welcome screen, click Begin

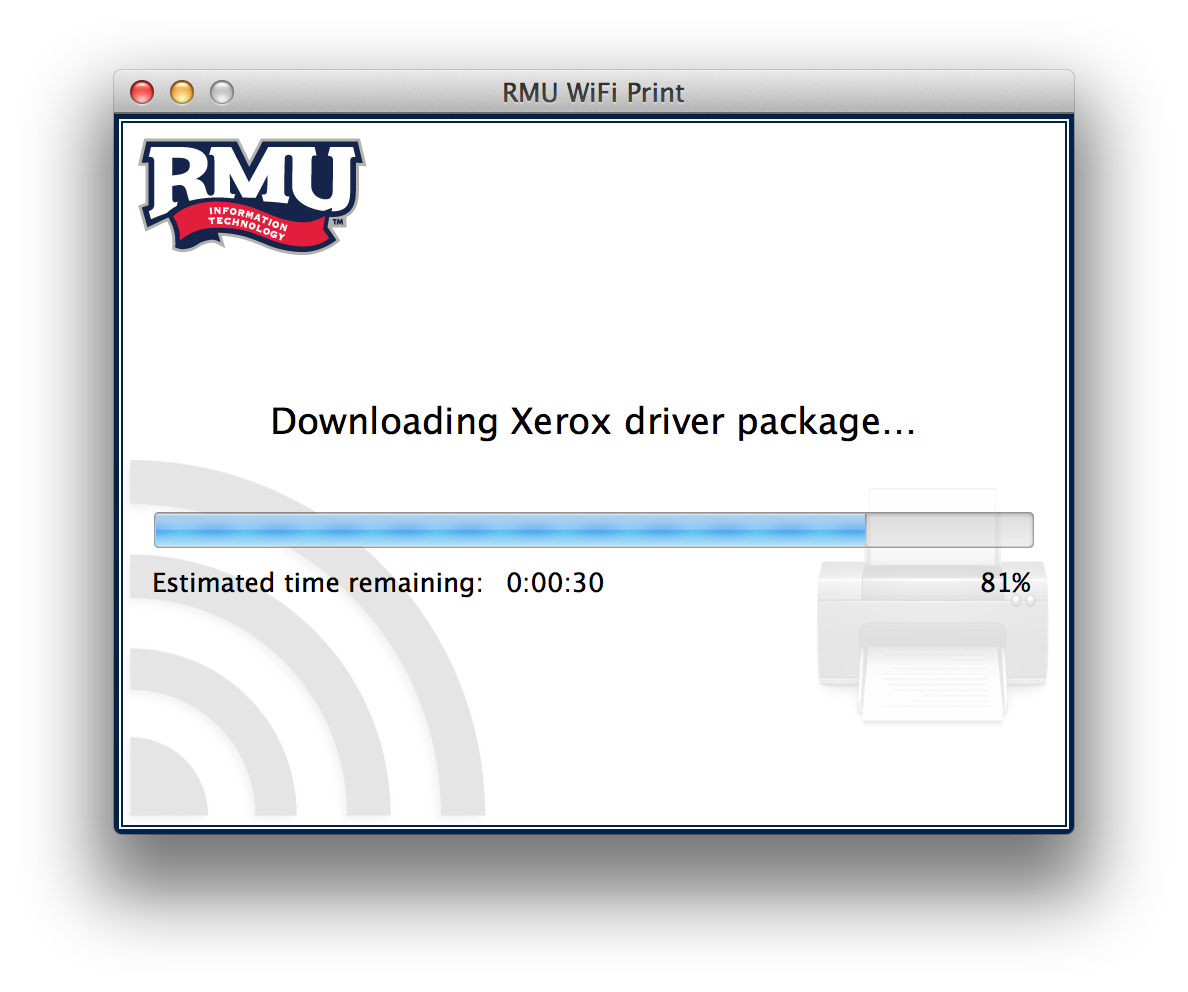
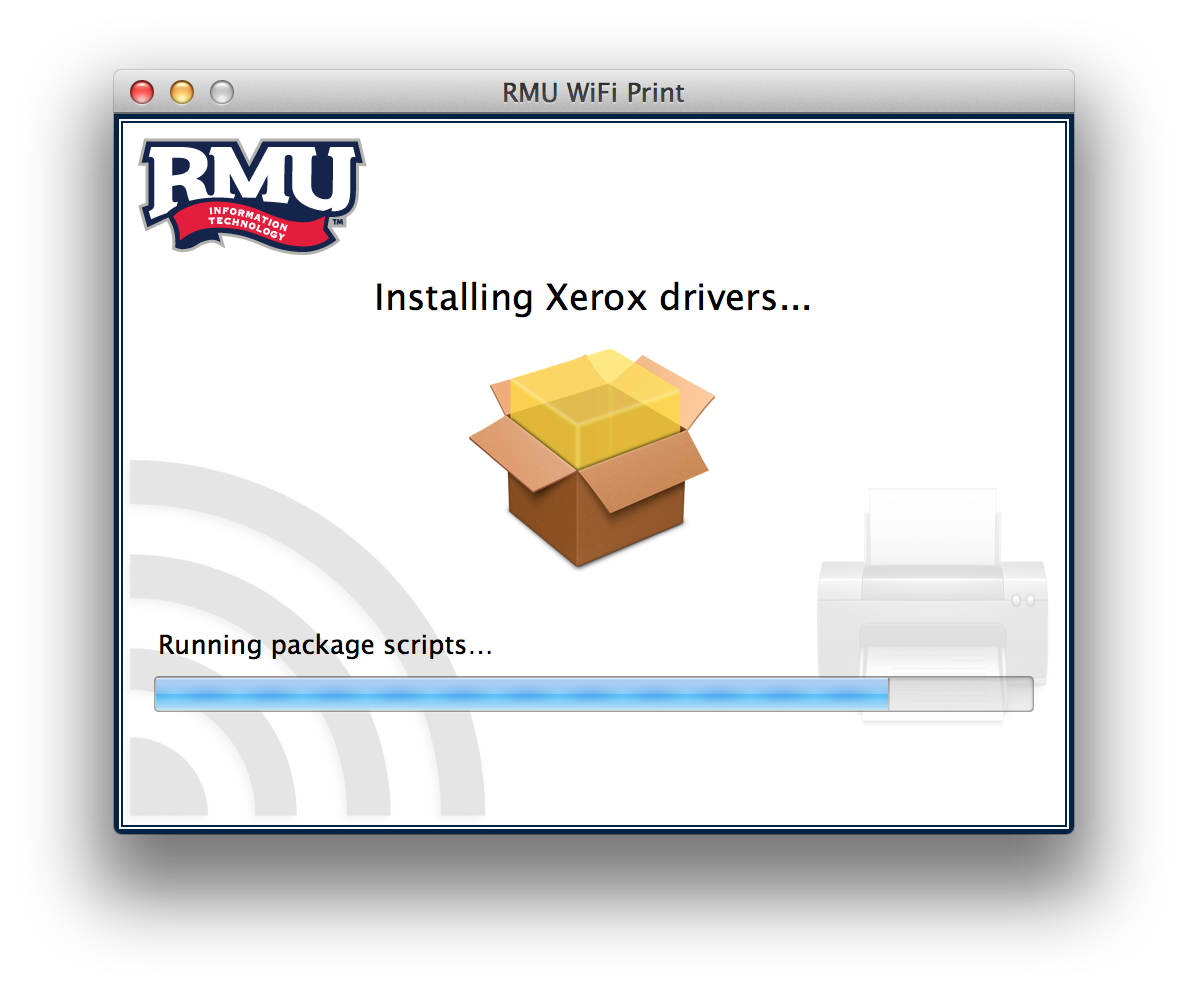
- Pharos Popup and any required drivers will begin downloading and installing.
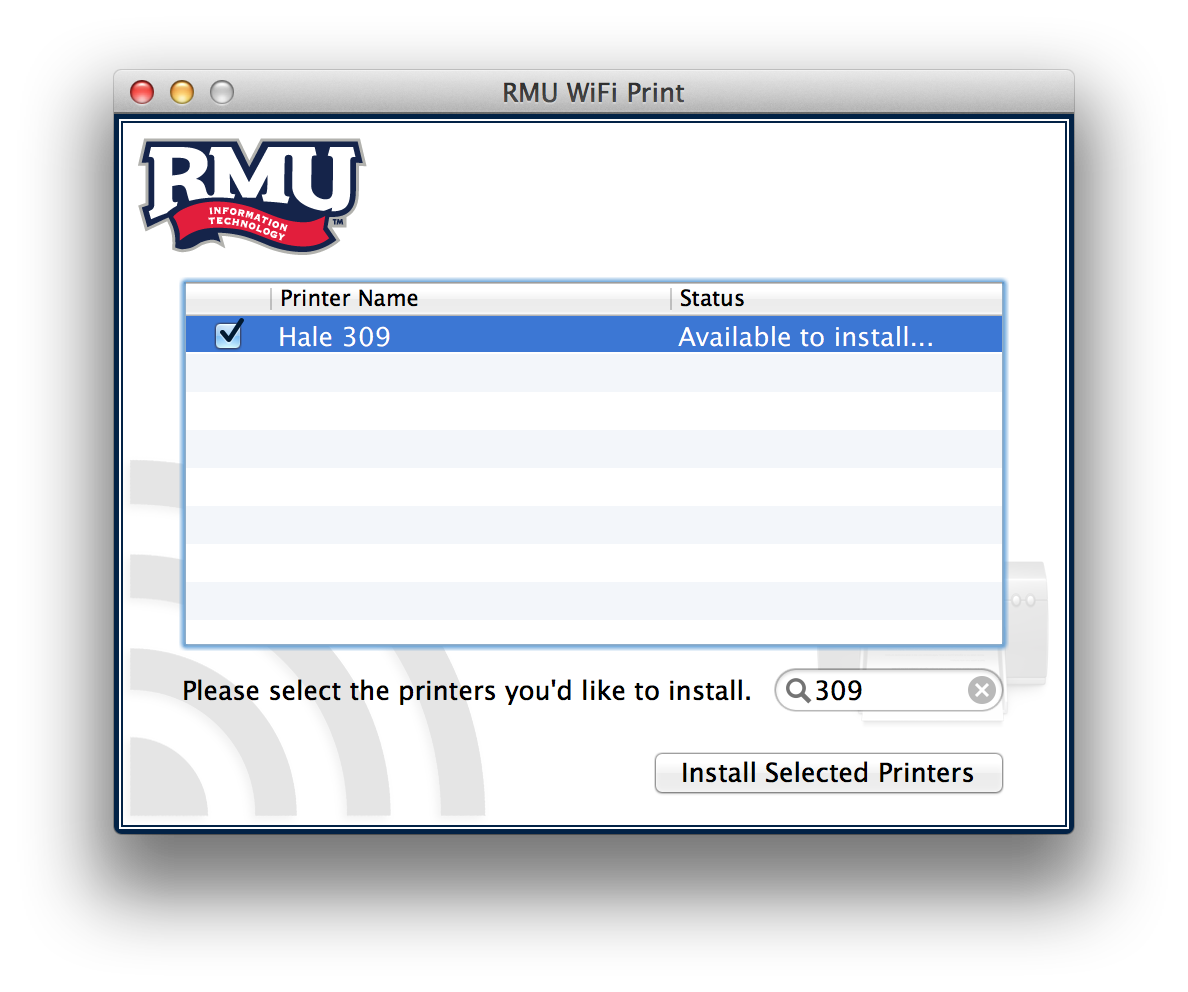
- On the Printer Selection screen, check the checkboxes next to any printers that you'd like to install. In the image below, the list has been filtered for "309", showing only Hale 309.
- As the printers install, you will see the status change to either "Already installed", "Installed!", or "Error!"
- You will see a success screen unless there was an error during installation. If there was an error, you will see an error screen with instructions on how to contact the Help Desk for assistance. The success screen is shown below.
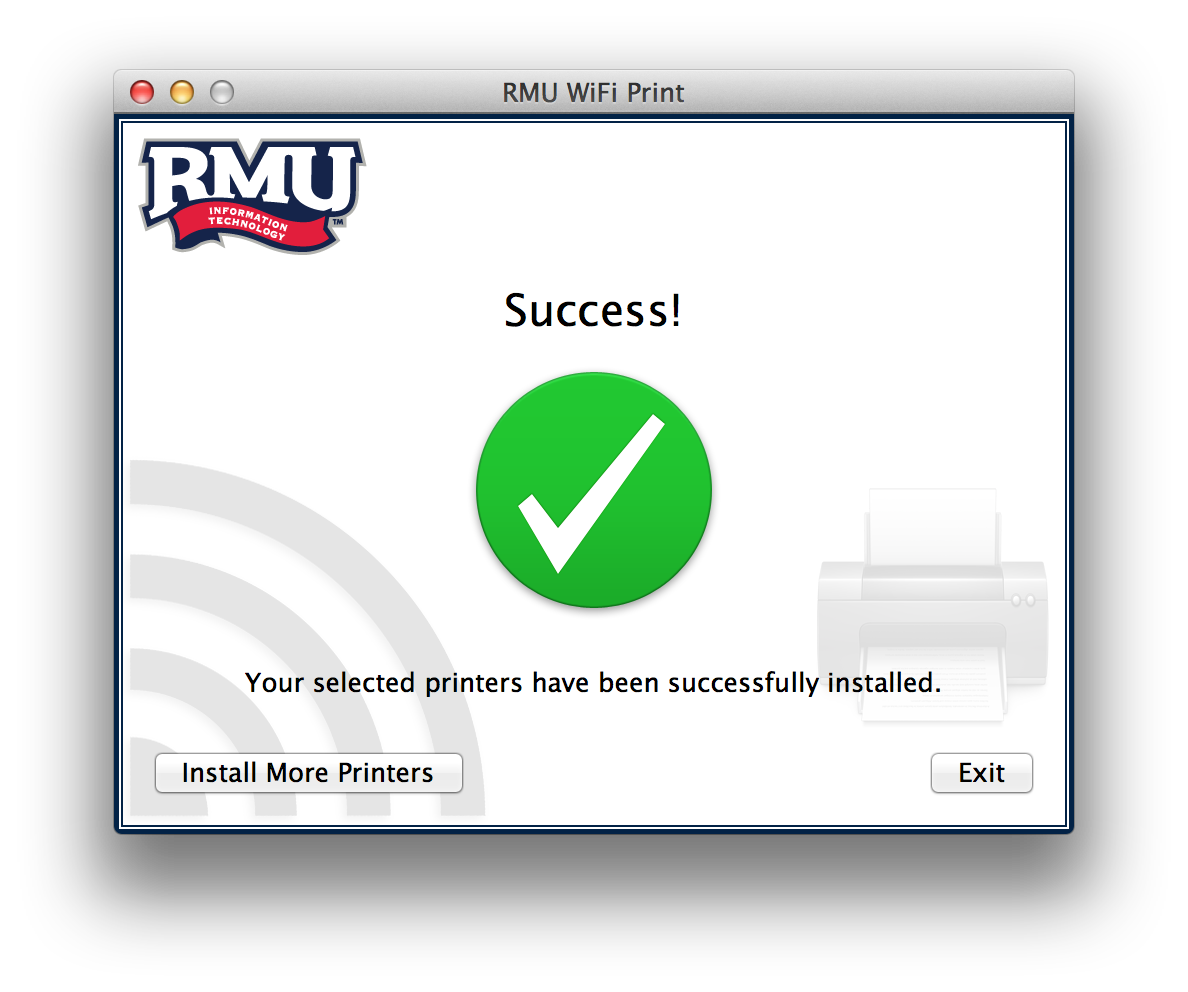
- Click Exit to exit the application or Install More Printers if you'd like to install more printers.
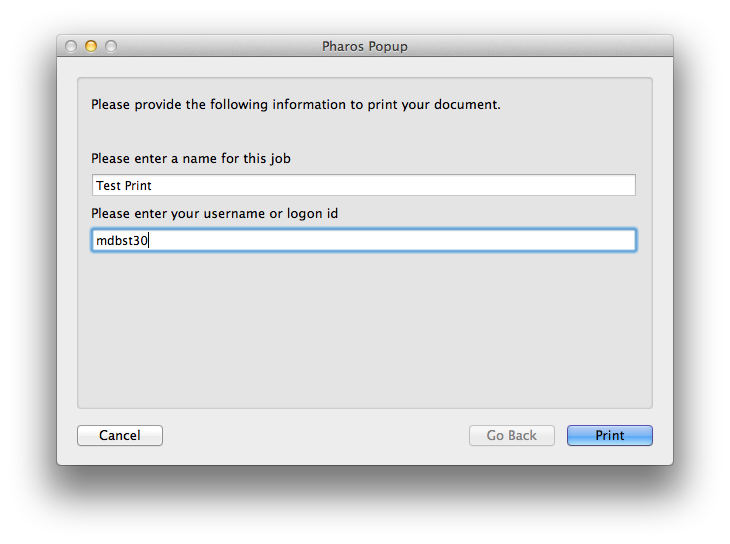
When printing to RMU's WiFi printers, you will be asked to enter your RMU user ID (and occasionally a job name). After entering both pieces of information, press Print to print your job. You will need to release the job at the print station.
The second time you open RMU WiFi Print for Mac 3.x, it will ask you if you'd like it to automatically check for updates. Select "Check Automatically" if you'd like the application to automatically check for updates on every launch. If you'd like to check for updates manually (instructions below), then choose "Don't Check".
Checking for updates manually
To check for updates manually, select "Check for updates..." under the RMU WiFi Print menu in the menubar.

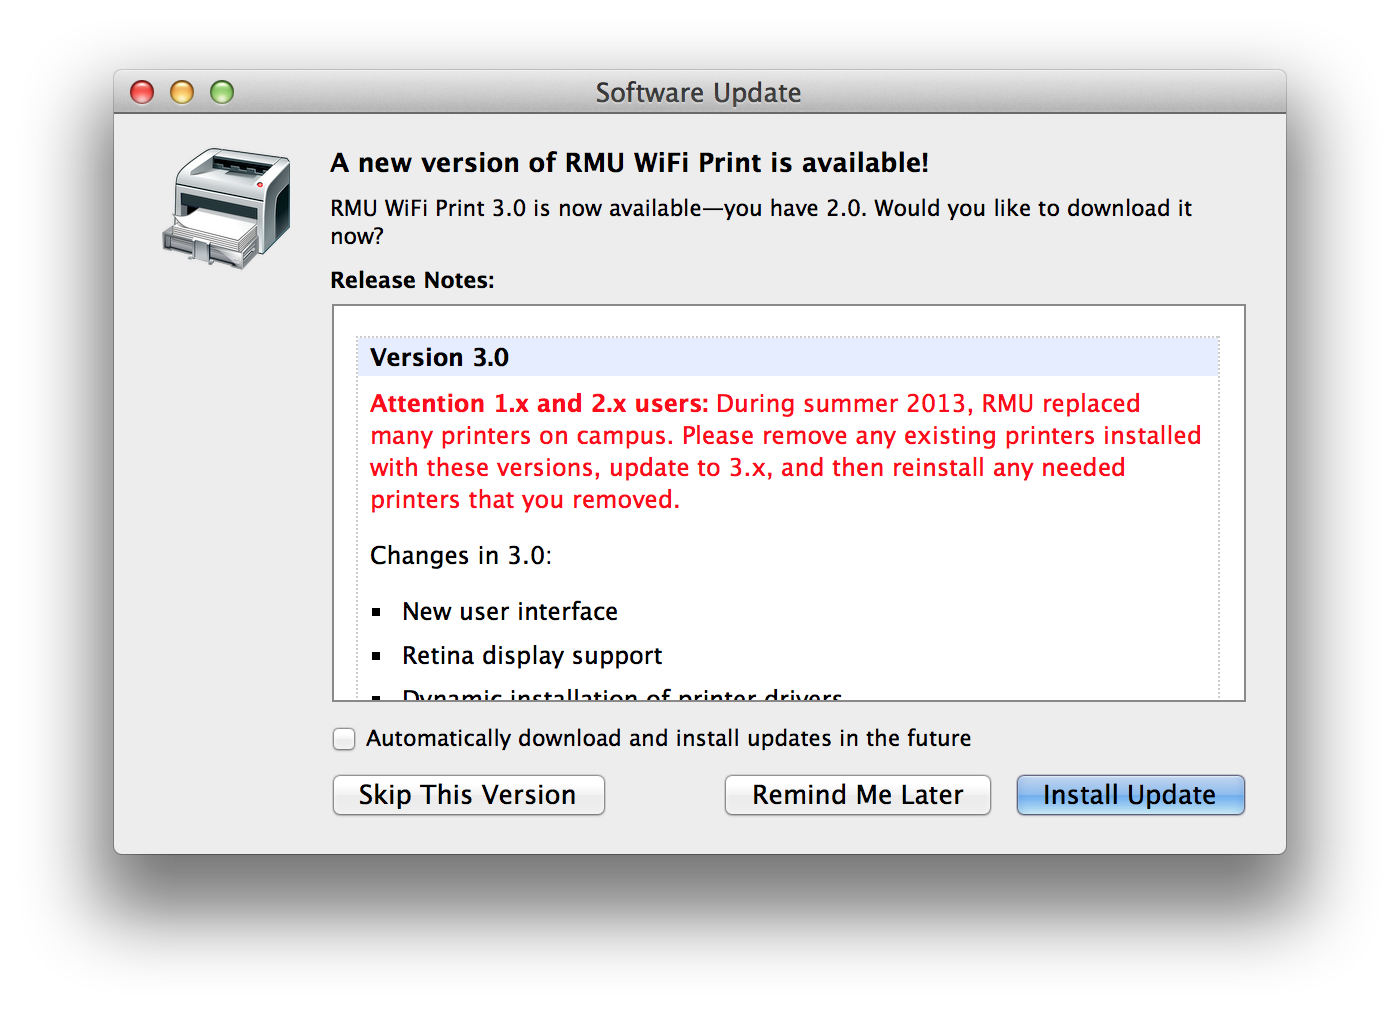
Updating when there is an update available
If your version is not up to date, you will see a message like the one shown below. You will be able to install the new version by clicking "Install Update". You can postpone the update by selecting "Remind Me Later". RMU IT does not recommend skipping a version.